Requirements:
You must have a copy of Contact Form 7 installed, activated, and working on your WordPress website in order to use the Magic Tooltips For Contact Form 7 plugin.
You can obtain a copy of Contact Form 7 here.
To get started:
Install and activate Magic Tooltips For Contact Form 7 and then you can begin adding tooltips to your Contact Form 7 fields right away.
Magic Tooltips For Contact Form 7 uses the custom HTML tag <tip>…</tip> to contain the tooltip content, but you should put it right behind the field label text.
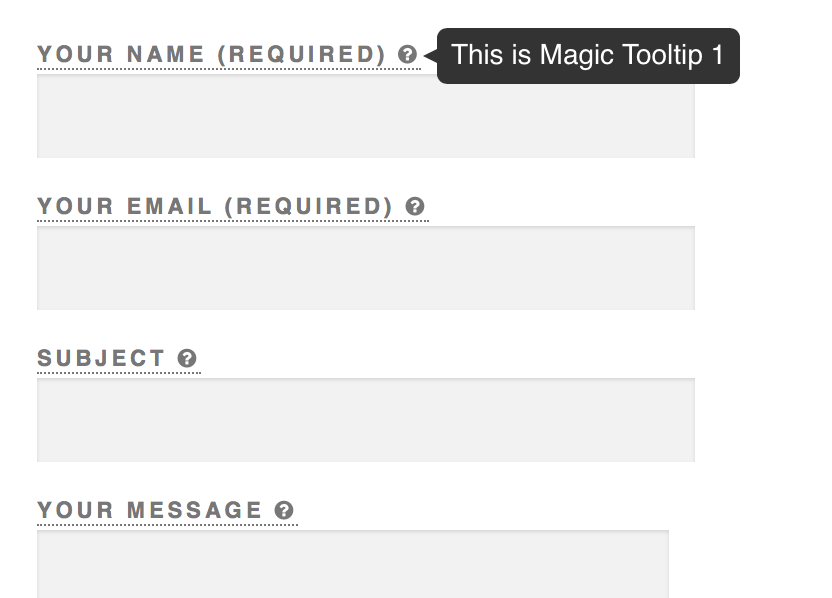
Below is an example of Contact Form 7 code with tooltips added.
<p>Your Name (required)<tip>This is Magic Tooltip 1</tip><br />
    [text* your-name] </p>
<p>Your Email (required)<tip>This is Magic Tooltip 2</tip><br />
    [email* your-email] </p>
By default, a question mark icon will show behind the field label when you save your form, and the field label will display with an underline now. When you move your mouse over the field label or the question mark icon, the content inside … will display as a tooltip.

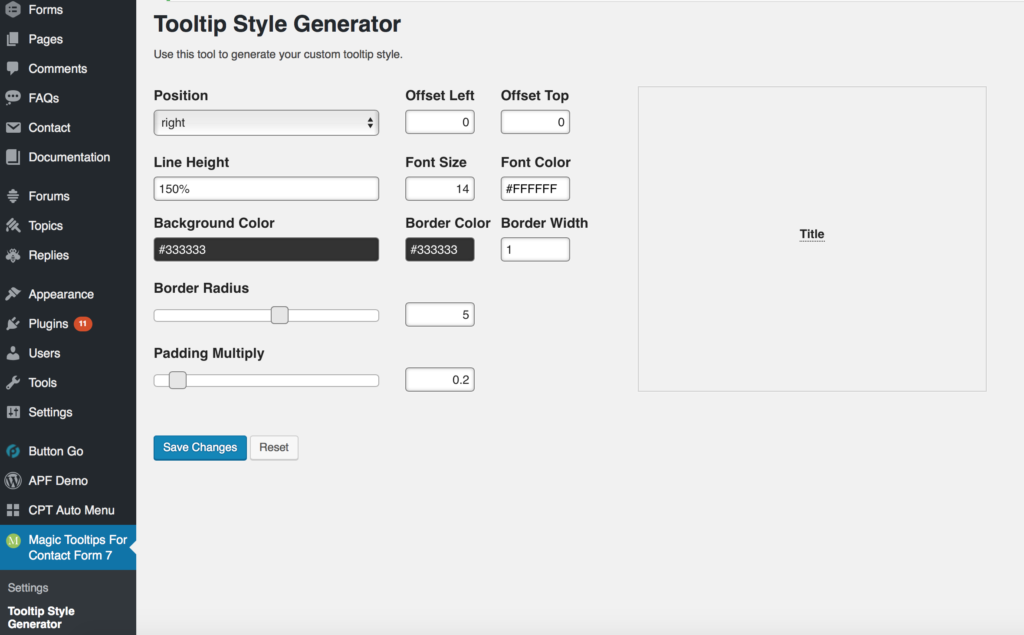
If you want to customize the visual style of your tooltips, just go to Dashboard -> Magic Tooltips For Contact Form 7 -> Tooltip Style Generator, and you will see a visual editor that you can use to adjust your tooltip styles.

If you want add extra tooltip styles, Magic Tooltips For Contact Form 7 supports custom CSS, please refer to the tutorial below about how to add your own custom CSS code.
Custom CSS Instructions for Magic Tooltips For Contact Form 7
